

When I was in the Sierras learning to forge my first knife, I encountered an unusual problem. I had finished forging the blade and had just mounted it in its handle when I realized: I didn’t have a sheath to store it in! I held a razor-sharp blade in my hands with no way to carry it safely.
But our teacher Sam had a solution: make a bark sheath! He showed me the technique I describe in this article.
The Bark Sheath
I had heard of making sheaths from bark but I had never given them much thought. I make my own leather sheaths and a bark sheath did not seem appealing. But needing to improvise a sheath made me appreciate the cleverness of fashioning one from readily available bark.
The bark I use in this example is White alder (Alnus rhombifolia), also called the California alder. Alders are members of the birch family (Betulaceae) and grow natively in riparian habitat in the northern Sierra Nevada Mountains.
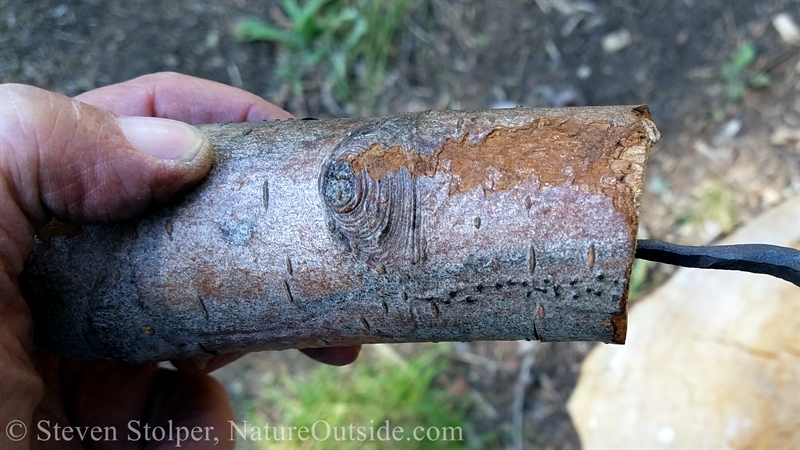
White Alder
Harvesting the Bark
The bark needs to be flexible and pliable. So we need to use living, green wood. I used my Laplander saw to collect a 1.5-inch diameter branch.
The next step is to create a bark-removal tool. I find a strong stick about half to three-quarters inches thick and bevel both sides of one end to a sharp point so that it resembles the end of a screwdriver.
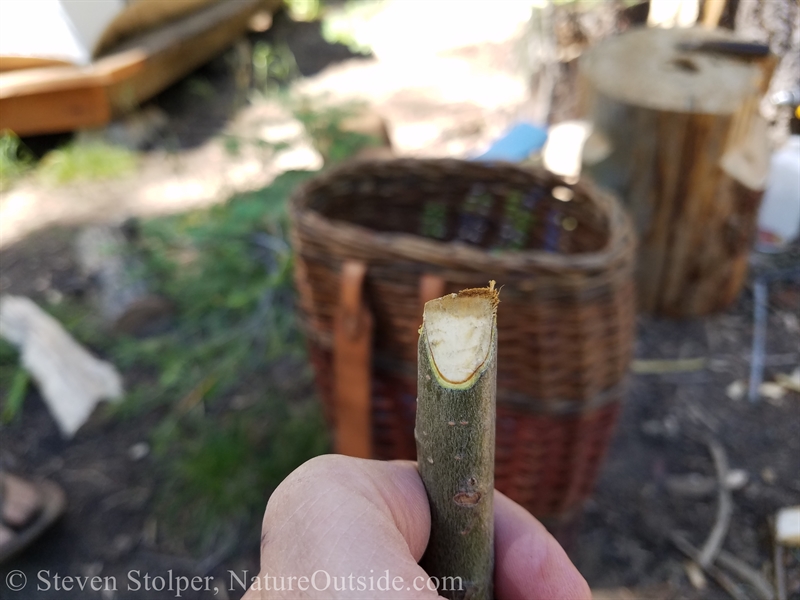
The Bark-Removal Tool.
I use my knife to make an incision through the bark down the length of the branch. I then “encourage” the bark to separate from the branch using the tool. I insert the end of the tool a few millimeters underneath the bark and run it down the length of the branch. Once that part of the bark is loose, I gently insert the tool farther underneath the bark and repeat the process.
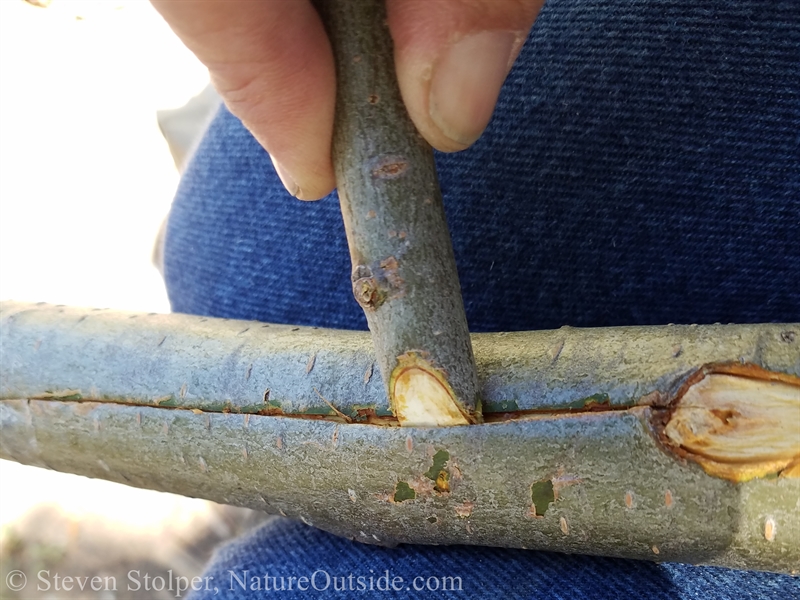
Harvesting the bark
It is necessary to be gentle and controlled. If I tear the bark, the piece may be unusable. Sometimes the bark is “stuck” to the branch, like around a knot. When this happens I use the tool to gently pry the bark from around the knot. I work meticulously to keep from tearing the bark. I want a long continuous trip.
Cutting the Bark
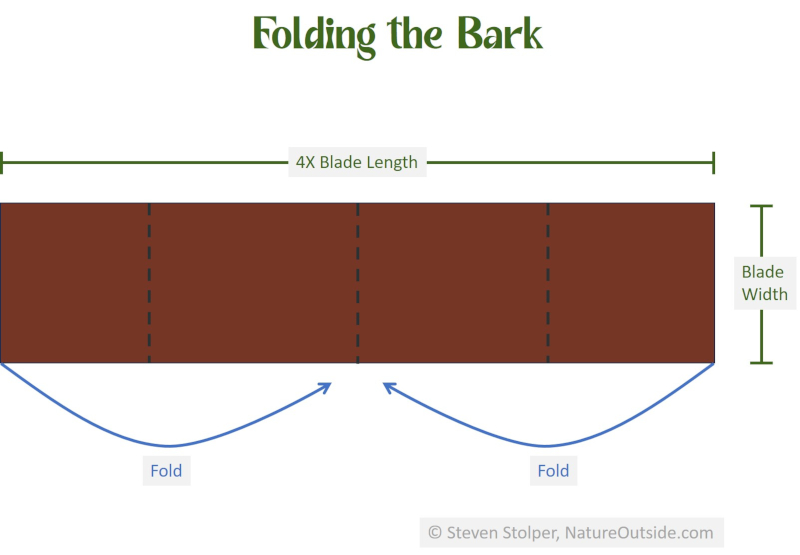
To make the sheath, I only need two pieces. One is a strip the width of the knife blade it will protect. The length of this “wide strip” should be four times the length of the blade it will house.
The second is a strip about half an inch wide and as long as possible. We will wrap this “narrow strip” around the wide one to make the sheath. If the narrow strip is too short, it will require weaving another narrow strip into the sheath. So ideally the narrow strip should be long enough to make the entire sheath without needing a second narrow strip.
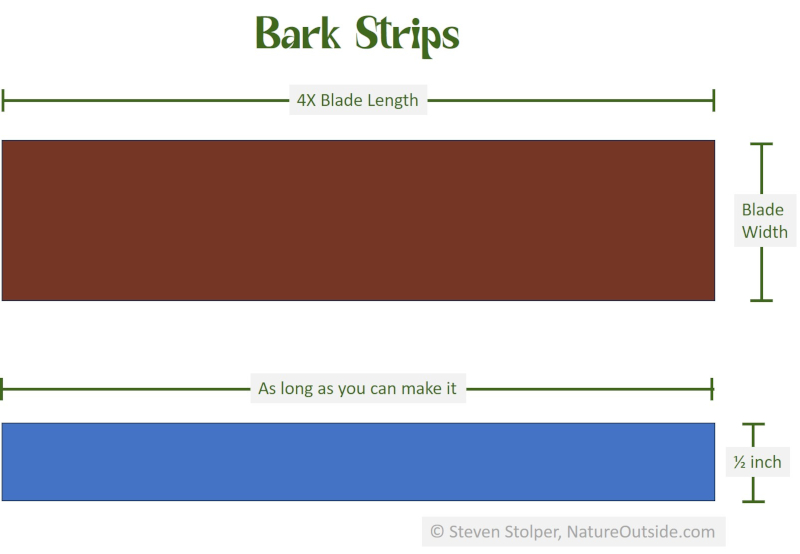
The bark strips we need to make the sheath.
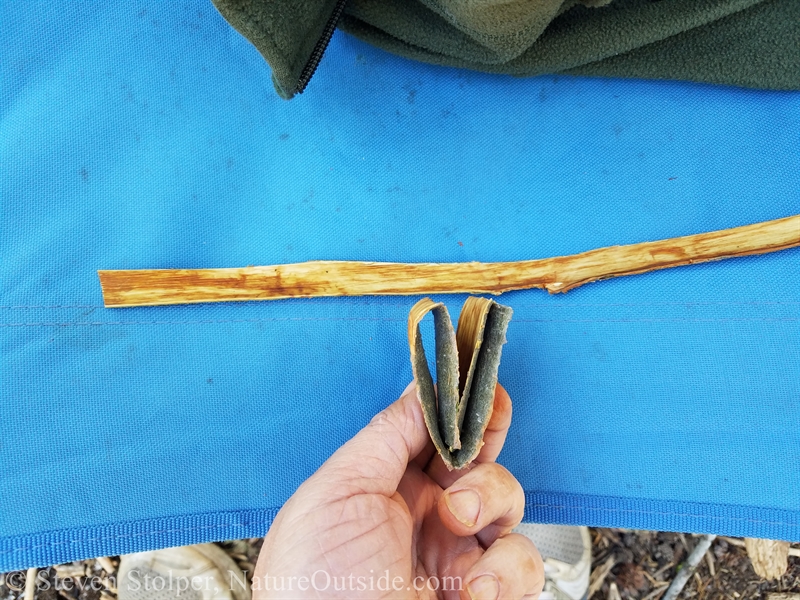
Here are the strips. The wide strip I have already folded over to begin making the sheath.
Fold the Wide Strip
I start by folding the wide strip in half. I am careful not to break it in two. It does not matter if the outer portion of the bark faces “in” or “out.” For aesthetic reasons, I choose to fold it so the outer part of the bark faces in.
Fold the wide strip in half.
Once I have the crease where it was folded in half, I straighten the strip and fold each end inward so that It goes all the way to the crease. Effectively, I have folded the wide strip into fourths to gain two layers of bark.
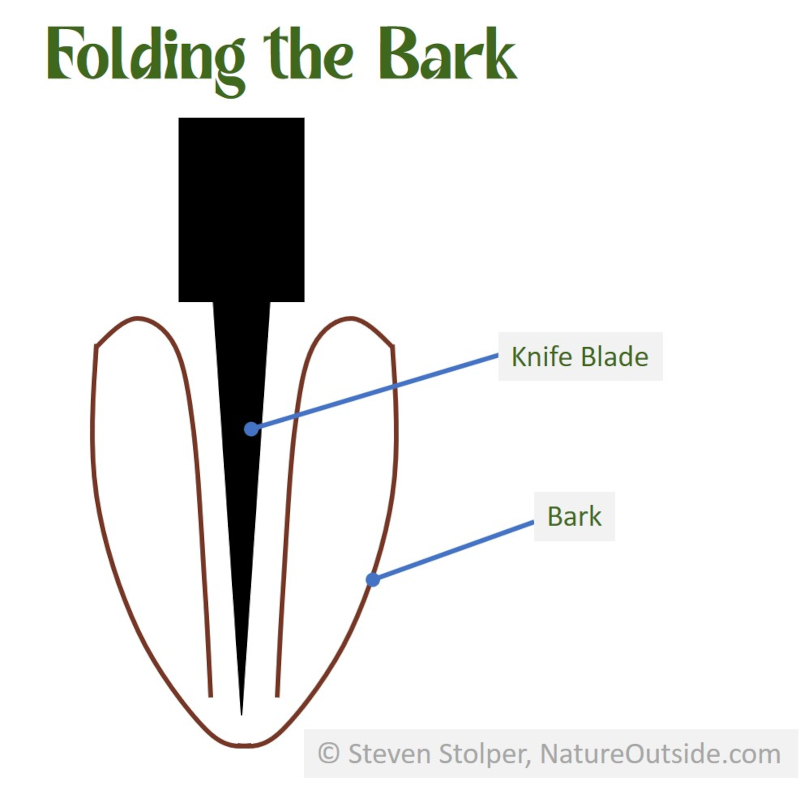
Here is the wide strip folded over and how it fits around the blade of the knife.
I leave it folded for about an hour while I take a break for lunch. I use a clamp to keep it in the folded position.
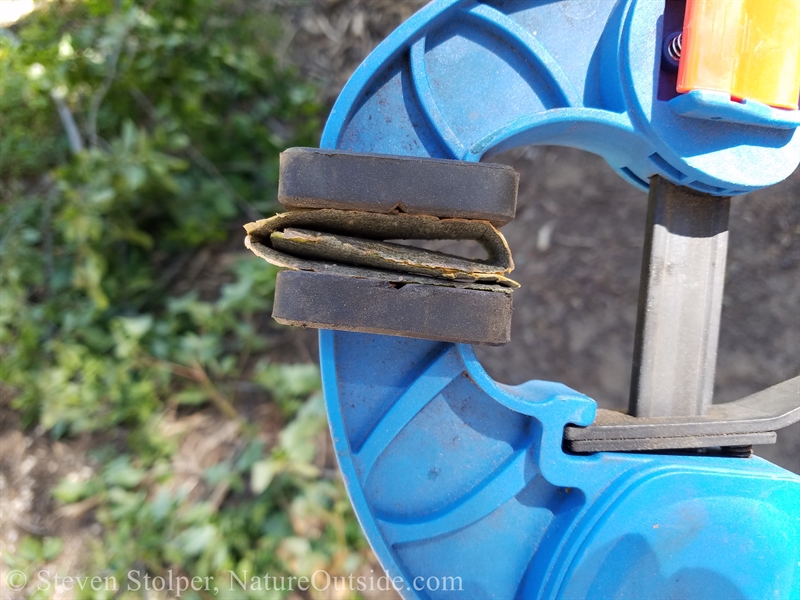
I leave the folded bark in a clamp (lightly held!) when I am not working on it.
Wrapping the Sheath
Here’s the fun part! I make the sheath by weaving the narrow strip around the wide strip. If you have woven a basket out of natural materials, this will be similar.

Anchor the bark between two layers of folded bark. Then wrap around in a spiral. Each revolution alternates between going around the outside of the sheath and inside between the folded layers.
Start by inserting one end of the thin strip between the folds at the “top” of the sheath. Hold it there by applying pressure to the sheath on each side with your thumb and forefinger. It is easier to do this if the knife is inserted in the sheath when you start. Weave the thin strip around and through the fold on the other side of the sheath. Go around again, but this time go around the outside of the sheath. After completing a revolution around the sheath, weave the thin strip between the folds. Alternate weaving the thin strip around the sheath and inside the folds. Each revolution change to the other. To finish, weave the thin strip inside the folds. It should stay there of its own accord. Then trip the thin piece so that it does not protrude from the fold.
Here is an example of a freshly wrapped sheath. Since the knife is so small, and I was in a hurry and only wrapped the thin strip around twice. But that is enough to hold the knife tight inside the sheath.
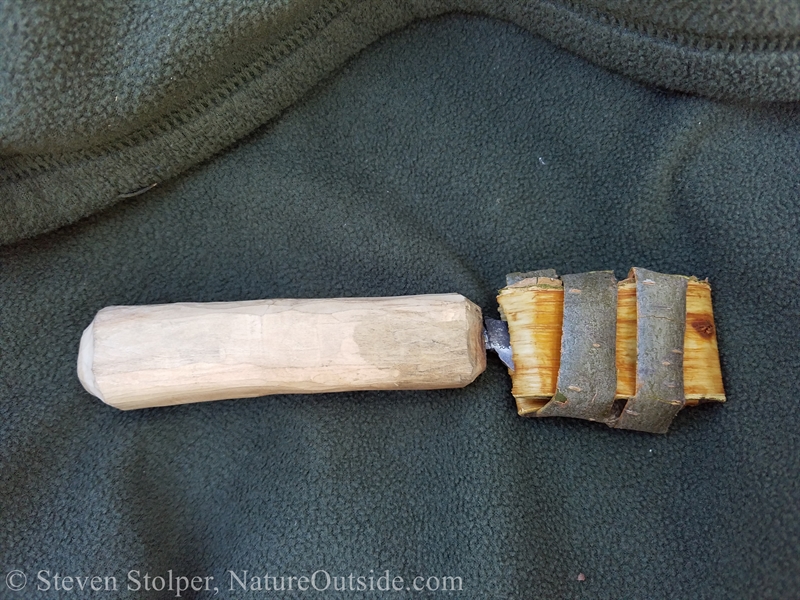
Freshly wrapped sheath
As the bark dries, it contracts slightly. So allow an extra millimeter in the dimensions of the wide strip when you cut it. Here is the sheath after the bark has dried.
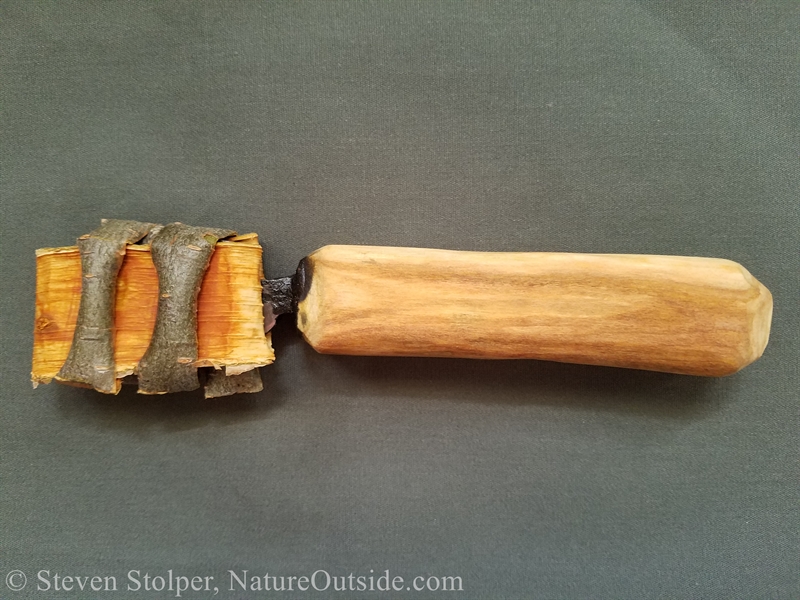
The sheath after the bark has dried.
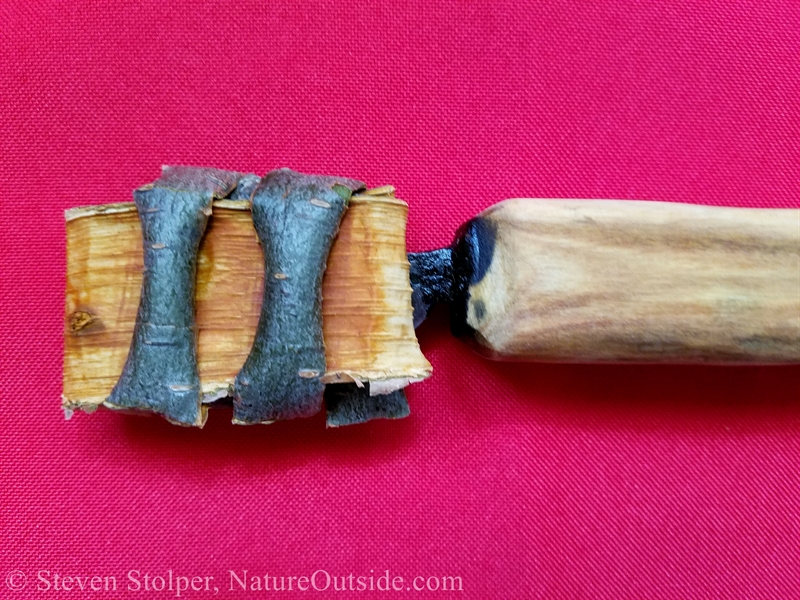
A closer look at the sheath
A Useful Skill
I had heard about bark sheaths but never thought they were useful. Surely, I would always have a leather sheath handy when needed. Now I realize that there are at least two instances when bark sheaths are handy. The first is when you need to protect a knife but do not have the time or materials to make a leather sheath. The second is if you lose a sheath in the field. You can construct a bark sheath to keep you and the blade safe until you find a leather sheath.
Just like leather sheaths, bark sheaths contain acids that can damage the blade over time. So never store your knife in a bark sheath. Instead use the bark sheath when transporting or using the blade.
These sheaths are surprisingly easy to make. So give it a try and let me know how it goes by leaving a comment below.
Related Articles on NatureOutside
How to Make a Custom Firesteel without Fancy Tools
Bushcraft Knife Safety – 9 Tips to Avoid Accidents
For fun facts and useful tips, join the free NatureOutside Newsletter.


Leave a Comment